Concept constructiv
Concept constructiv
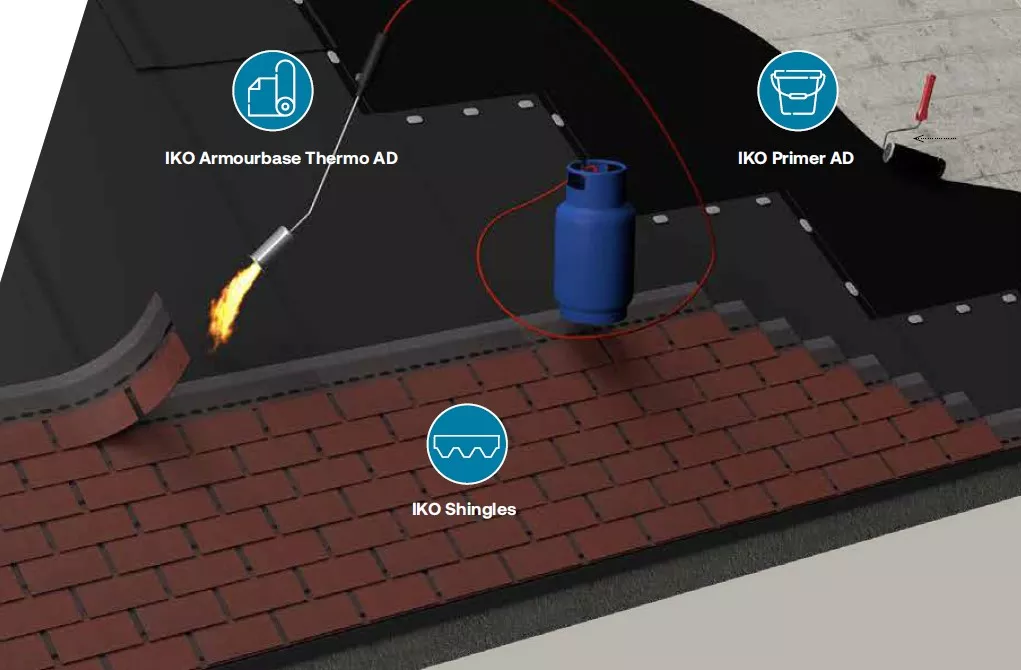
The concept consists of
-
a primer for the roof deck and
-
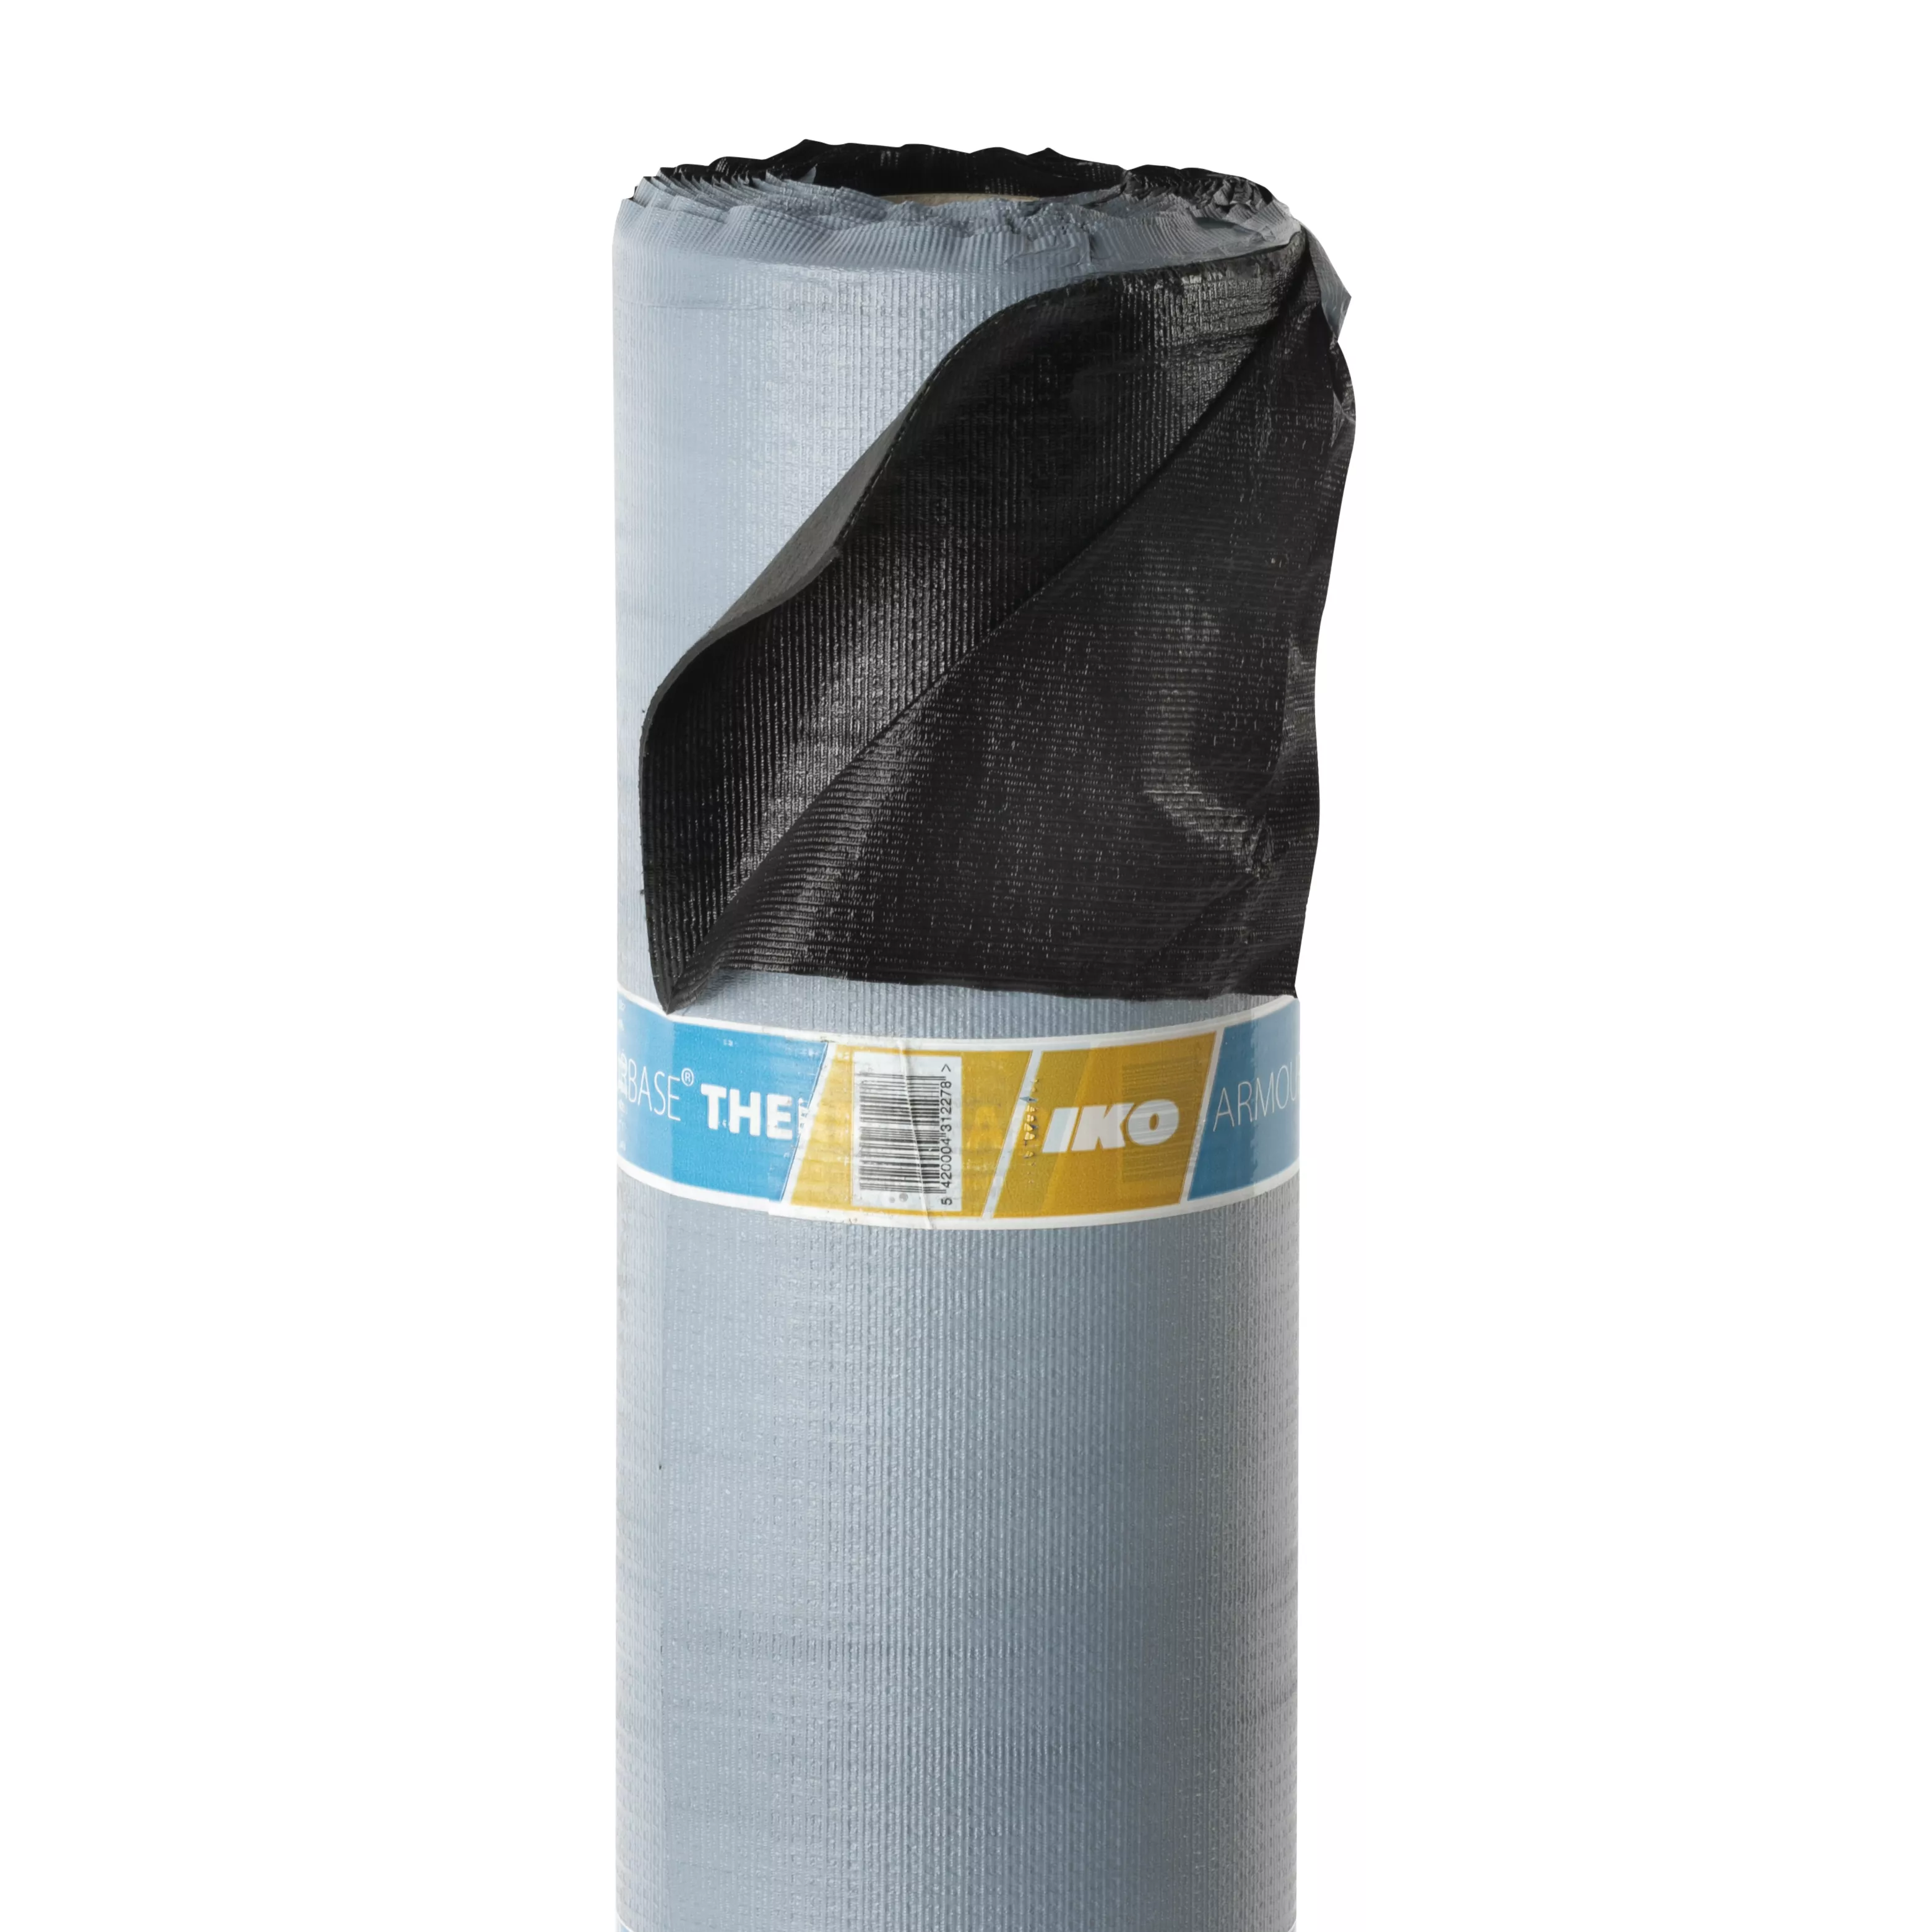
a thermo-adhesive and heat activated waterproofing membrane,
-
where all residential IKO shingles can be adhered to the membrane (no nailing required!)
IKO Armourbase Thermo AD is an aesthetical solution for low sloped roofs in:
-
OSB (min. 4° - max. 15°)
-
or concrete (min. 4° - max. 45°)
with a secure concept system, finished with IKO shingles.
Informații produs
Membrana Armourbase Thermo AD
| Lungime | 7,5 m |
| Lățime | 1,0 m |
| Grosime | 2,5 mm |
| Armătură | Poliester armat |
| Partea superioară | Polipropilenă nețesută / Folie detașabilă din polietilenă siliconată |
| Partea inferioară | Folie detașabilă din polietilenă siliconată |
| Flexibilitate la termperatură scăzută | NPD |
| Rezistență la tracțiune L/T | 400/300 N/50 mm |
| Alungire la rupere L/T | 35/35 % |
| Rezistența la sfâșiere L/T | 120/120 N |
| Stabilitate dimensională | -0,3 % |
| Performanța la foc exterior | Class FROOF |
| Reacția la foc | Class F |
| Impermeabilitatea la apă | 60 kPa |
| Permeabilitatea la vapori | 100000 µ |
| Rezistența la dezlipire a rosturilor la 180° cu șindrile APP | 50 N |
| Rezistența la dezlipire a rosturilor la 90° pe suport din lemn | 70 N |
Primer AD
| Aspect | Lichid |
| Culoare | Maro |
| Densitate la 20° C în kg/l | 0,98 - 1,08 |
| Timp de uscare superficială | Aproximativ 20 min. (+20°C) |
| Timp de uscare în peliculă | Aproximativ 90 min. (+20°C) |
| Reziduu uscat la 130° C | 30% ±5 |
| Consum | 200/300 gr/m² în funcție de absorbția substratului |
| Punct de inflamabilitate | Neinflamabil |
| Ambalare | 20L |
Fixare mecanică
| Caracteristic tehnice | Șurub EFHD-63045 | Taler de susținere DVP-EF-8040N |
| Diametru | 6,3 mm | 80 x 40 mm |
| Diametru orificiu | - | 6,5 mm |
| Lungime | 45 mm | - |
| Lungime filet | 40 mm | - |
| Tipul capului/tipul vârfului | Hexalobular Torx T25 / Ricoh | - |
| Conținut/ambalaj | 1000 buc. | 500 buc. |
Downloads
Soluția ideală pentru ...
- Acoperișurile cu pantă redusă din OSB: pe acoperișurile cu panta cuprinsă între 4° și 15° membrana Armourbase Thermo AD se montează paralel cu streașina fără fixări mecanice în zona de suprapunere.
- Strat support din beton: aplicare paralel cu streașina fără fixare mecanică pe acoperișuri cu pantă cuprinsă între 4° și 15°. Pentru pante mai mari (max. 45°), aplicarea se face perpendicular pe linia de streașină cu fixare mecanică obligatorie în zona de suprapunere (șuruburi cu talere de fixare).
- Termoizolație peste substrat din beton sau OSB cu panta acoperișului(min. 4°- max. 15°): Termoizolația trebuie să fie aplicată cu fixări mecanice de stratul suport, beton sau OSB, doar dacă panta acoperișului este cuprinsă între 4° și 15°. În astfel de situații membrana Armourbase Thermo AD trebuie să fie fixată mecanic în dreptul suprapunerilor datorită aderenței limitate la materialul termoizolant.
- Renovarea acoperișurilor existente (> 4°): (doar daca stratul suport este uscat, curat și impermeabil) Primer AD + fixările mecanice sunt indispensabile pentru montajul membranei.
How to apply the torch on system?
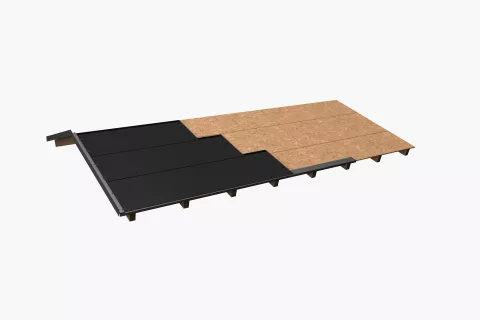
Application of the underlayment on a wooden deck
Apply the membrane parallel with the eaves - vertical and horizontal overlaps should be min. 10 cm. Set the roll of Armourbase Thermo AD and remove the release film from the back. In warm, sunny weather the underlayment will stick with the wooden deck in a short time.
For slopes between 4° - 15° it is not necessary to fix the underlayment on overlaps. It is advisable to go with proper metal flashings at the eaves and rakes.
Provide horizontal and vertical overlaps 10 cm between the sheets and make sure to remove the side selvedge release foil. After application use a suitable roller and apply pressure over all overlaps.
The adhesion of Armourbase Thermo AD will start with the application of bituminous shingles by torch-on.
Application of the underlayment on a concrete deck
Apply the membrane parallel with the eaves - vertical and horizontal overlaps should be min. 10 cm. The position of Armourbase Thermo AD on the concrete deck with slopes higher than 15° should be perpendicular to the eaves.
The concrete deck must be primed with the Primer AD (bituminous primer) before the application. Set the roll of Armourbase Thermo AD and remove the release film from the back. In warm, sunny weather the underlayment will stick with the primed concrete deck in a short time. In cold weather you can help to set the Armourbase Thermo AD underlayment with a hot air gun or a torch.
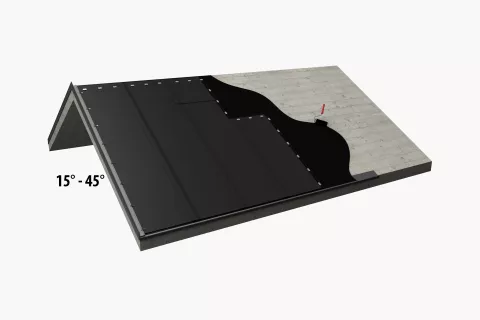
For slopes between 4° - 15° it is not necessary to fix the underlayment on overlaps. For concrete decks with slopes between 15° - 45°, fixation is mandatory. This can be ensured with screws and metal pressure plates for concrete. There is a need to pre-drill holes every 30 cm on overlaps. It is advisable to go with proper metal flashings at the eaves and rakes. Provide horizontal and vertical overlaps 10 cm between the sheets and make sure to remove the side selvedge release foil. After application use a suitable roller and apply pressure over all overlaps.
The adhesion of Armourbase Thermo AD will start with the application of bituminous shingles by torch-on.
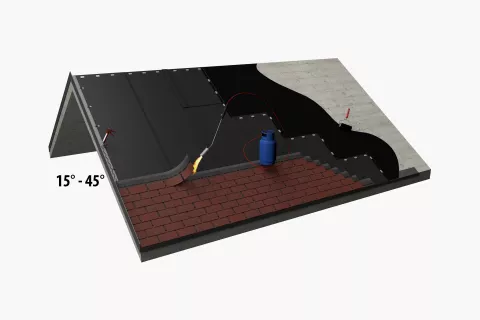
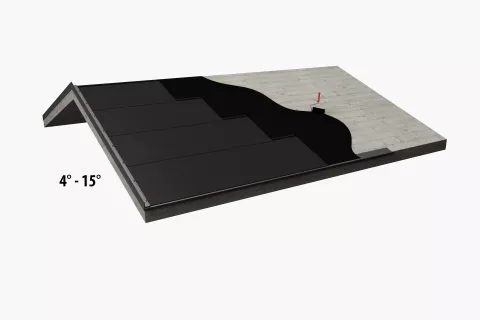
Horizontal "Armourbase Thermo AD" application on low sloped concrete deck (4°-15°)
Vertical "Armourbase Thermo AD" application on concrete deck (15°-45°) with mechanical fixing
Contact us for more information on the Armourbase Thermo AD torch on membrane system
Application of bituminous roof shingles on wooden and concrete deck
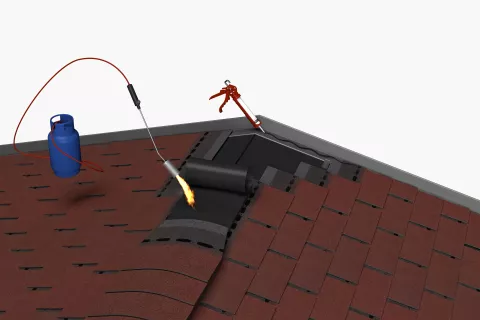
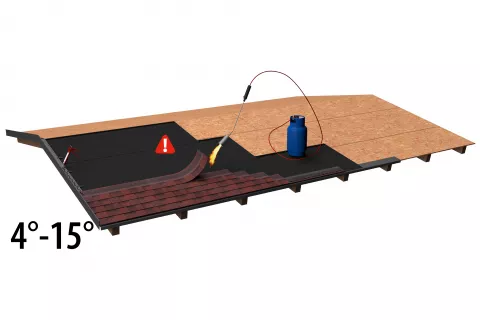
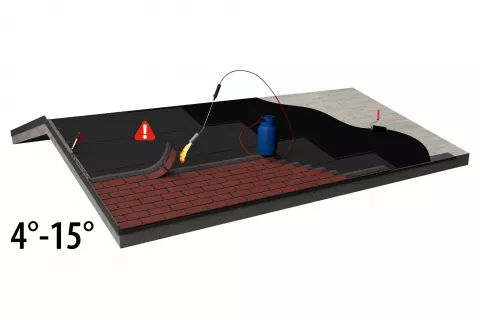
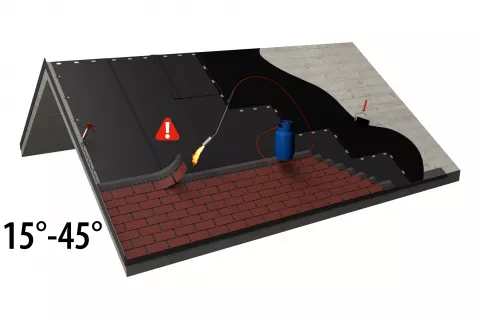
This shingle application is similar to the regular shingle application concept which starts with a starter strip (a shingle with tabs cut off). Apply by heating/flaming the top layer of Armourbase Thermo AD until the polypropylene mat fabric disappears and the top bitumen coating is melted.
Lay the shingle to the melted top adhesive layer of the membrane in its proper place. If necessary, lift the upper part of the shingle with a trowel. Heat up the section of the membrane just underneath the lifted shingle. The back of the shingle should be warmed in order to get the best possible adhesion.
Continue with the diagonal installation of shingles, without using nails. It’s not necessary to torch the shingles from the top. Excessive heat can damage shingles. Essentially shingles are applied for aesthetic reasons only and the waterproofing properties derived from the roofing membrane. For the torch-on method and slopes up to 45° the fixation of shingles with nails is not necessary.
The Armourbase Thermo AD membrane will bring about the total, monolithic adherence between the support and the bituminous shingles.
Torch only on the upper face of the membrane and stick the shingles in the activated Armourbase Thermo AD. Do not torch the shingles!
Torch-on application of shingles on OSB wooden deck on slope between 4° and 15°
Torch-on application of shingles on concrete deck on slope between 4° and 15°
Torch-on application of shingles on concrete deck on slope between 15° and 45°
Hips and ridges on a wooden deck
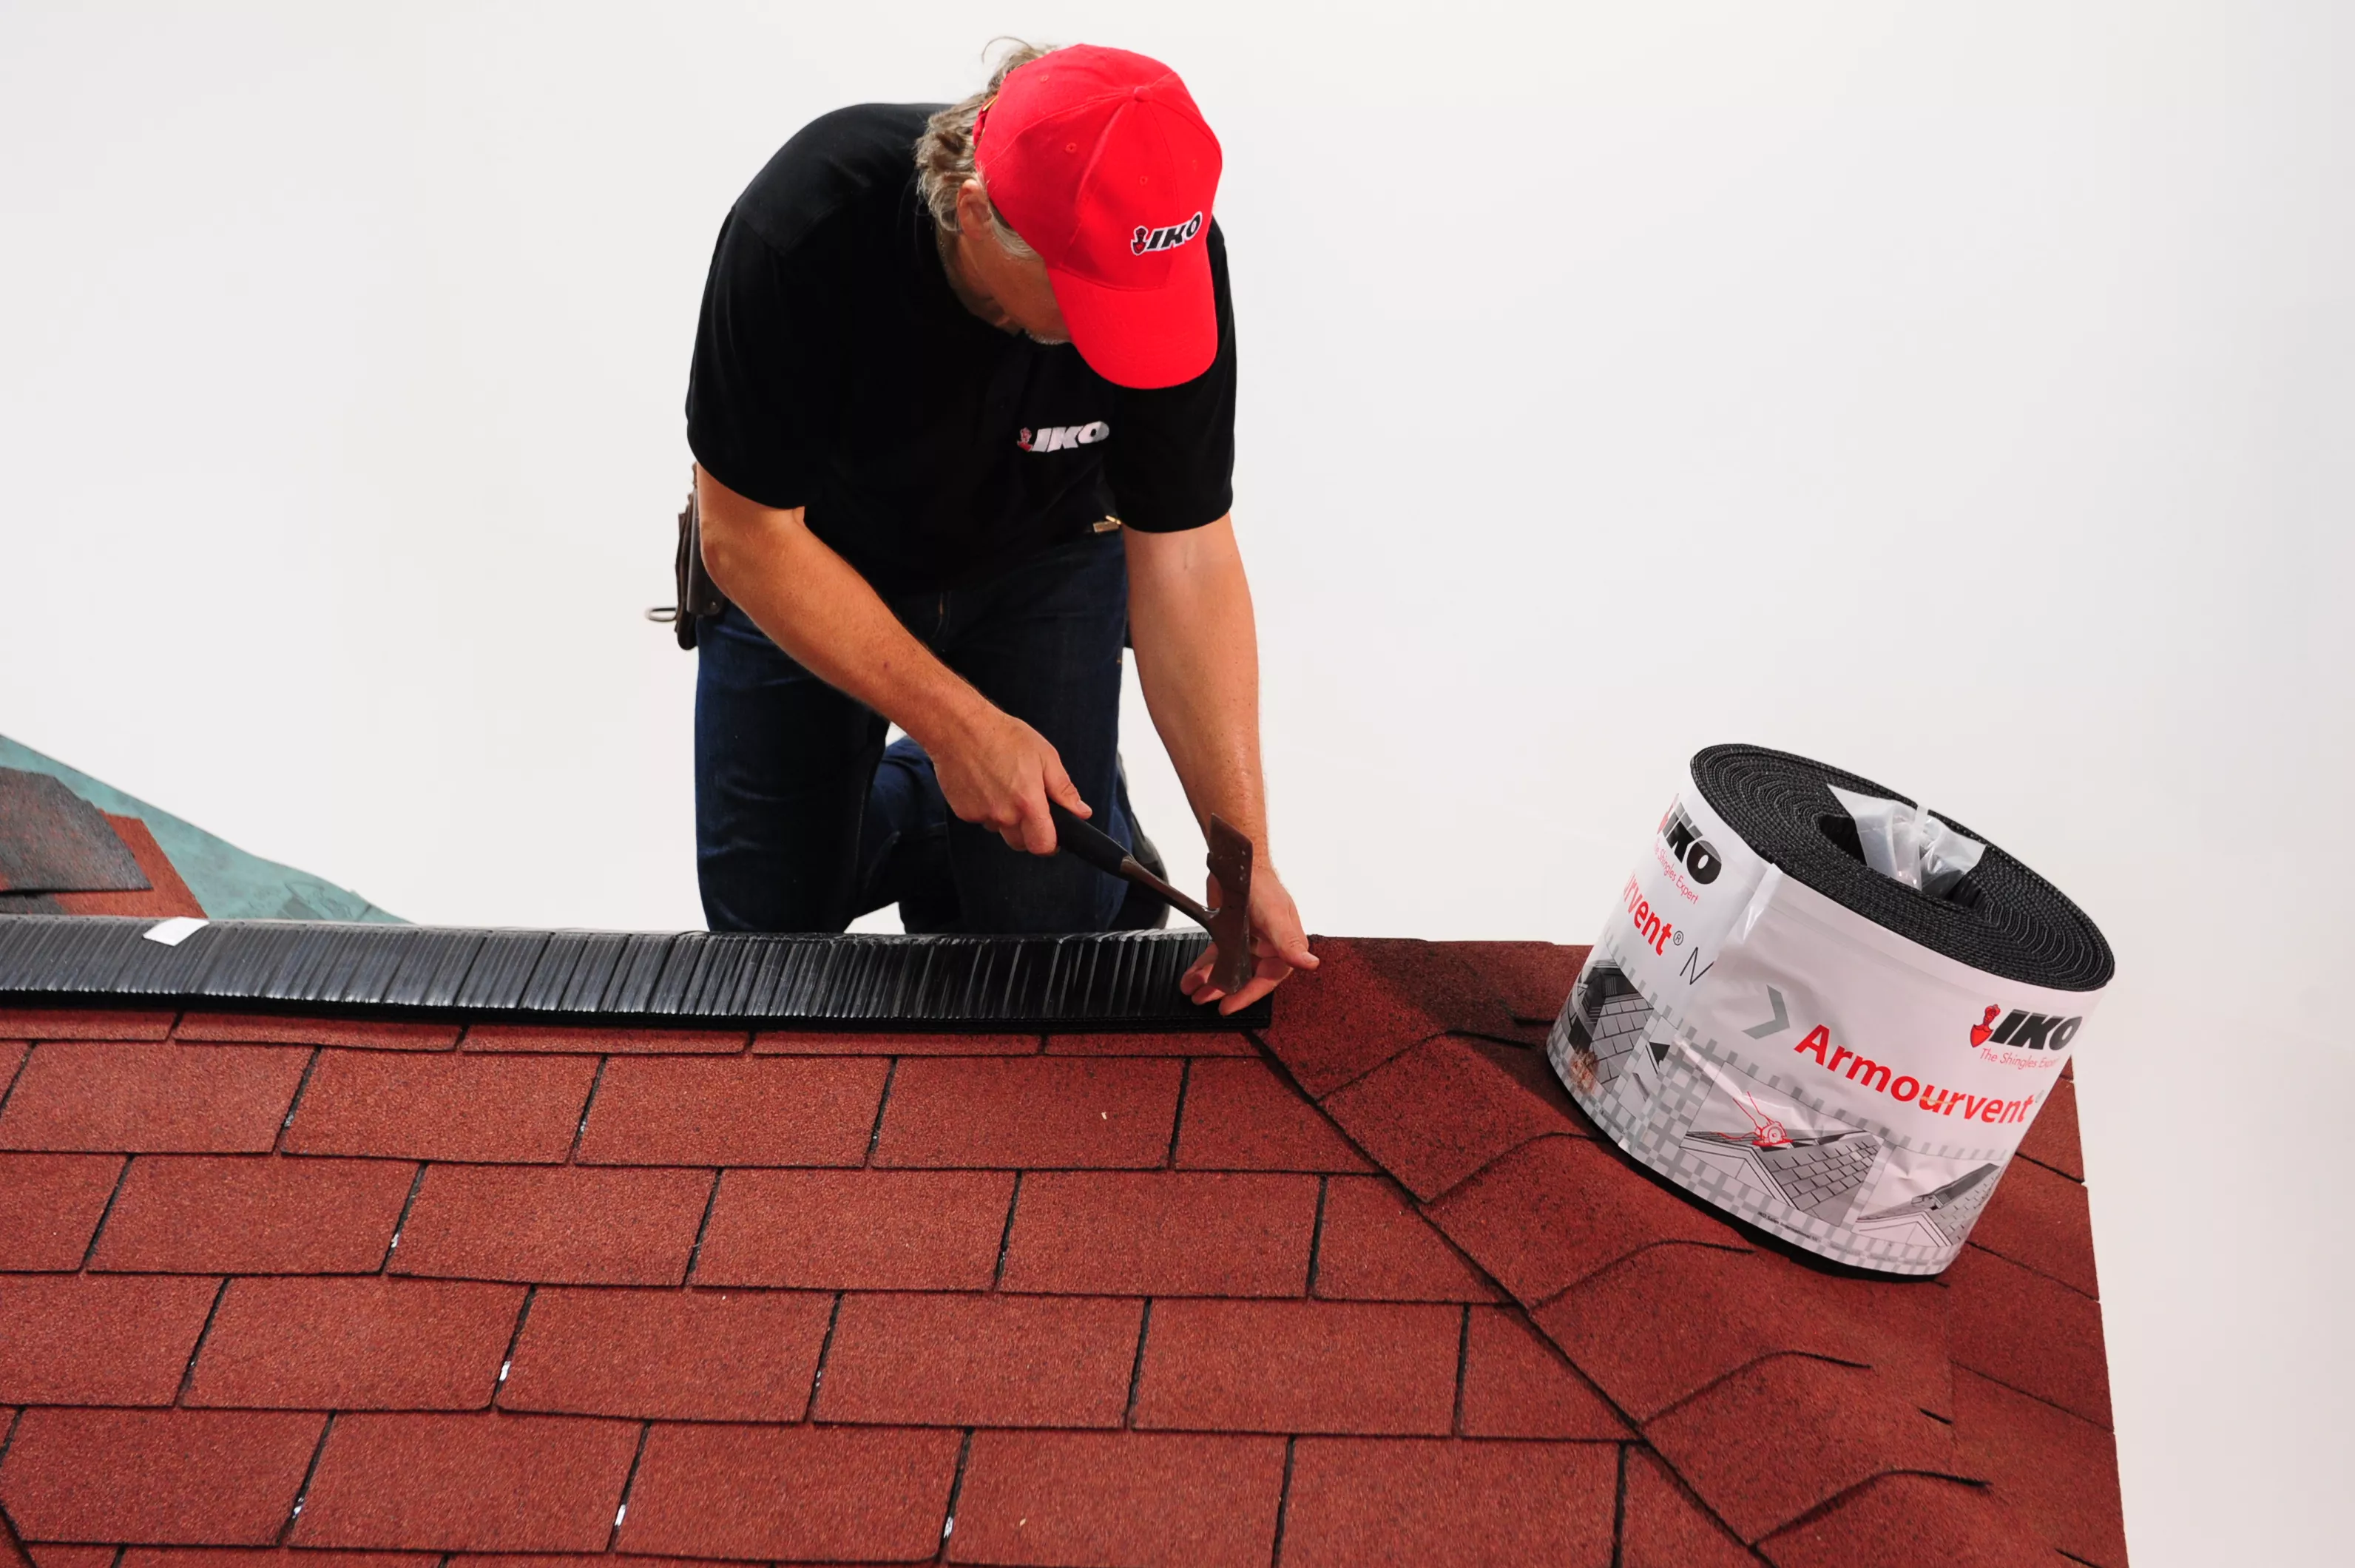
With hip and ridges, the underlayment is already covered with shingles. Therefore hips and ridges are installed by gluing the parts. For the hip or ridge, the Armourvent Multi ventilation can be applied from a 4° slope.
Armourvent Multi must be glued on both sides with the IKO Shingle Stick and then nailed to the wooden deck. Hereafter the shingle capping will be applied over it the same way as with a roof > 15°.
In special cases, when the insulation is between the wooden deck and shingles (the warm roof) and the pitch of this roof is between 4° - 15°, the mechanical fixing is mandatory.
Then the best and most recommended solution will be to torch APP shingles over this structure.
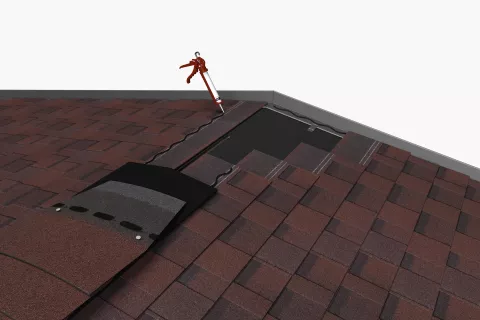
For slopes between 4° and 15°, IKO recommends installing an extra OSB or wooden wedge and raising the ridge with Armourvent Multi ventilation. This avoids water infiltration in case of ponding water close to this ridge.
Hips and ridges on a concrete deck
On a concrete deck, a piece of 30 cm is trimmed from Armourbase Thermo AD and torched on the top part of the roof over the last rows of shingles. Then the capping can be torched over this membrane. Given the density and thermal mass of concrete decking, ventilation is not required in the air space beneath the deck.
